The best way to install Google Analytics on WordPress

In this article, we’ll be covering how to set up Google Analytics in WordPress. But first, here’s some information on why you might want to do such a thing.
Google Analytics is one of the best tools at your disposal for learning more about who your website visitors are, where they come from, and what they were looking for when they arrived on your site. It’s an invaluable tool for determining what kind of content to focus on publishing on your blog, and best of all, it’s completely free.
In many ways, it’s even easier to set up Google Analytics in WordPress site than a hand-coded website. Because you can use a plugin, there’s no need to mess with your website’s code, and once it’s configured properly, you can pretty much just forget it’s even there.
This guide will teach you everything you need to know to get started with this powerful free tool, how to set up Google Analytics in WordPress, and test it to make sure it is working properly.
The benefits of using Google Analytics with WordPress
Once you’ve completed the following few simple steps, you’ll be able to discover a wealth of information about your website and its visitors. This includes how people find your website, how many pages they view during each visit, what your most popular content is, and a whole lot more.
You can also set up goals in Google Analytics, such as file downloads, newsletter sign-ups, or product sales, then measure your site’s performance against those goals. Armed with all this data, you can then start working on optimizing your website for better results, no matter what the purpose of your site.
How to set up Google Analytics in WordPress
By the end of this article, you’ll know exactly how to set up Google Analytics in WordPress. The process is a lot easier than you might think, and once finished, you’ll be able to get to know your website and its visitors much better.
1. Create a Google Analytics account
The first thing you need to do in order to take advantage of this tool is to create a Google Analytics property for your website. If you do not yet have a Google Analytics account, you’ll create the property during the signup process.
Go to the Google Analytics homepage and click “Sign Up.” Log in with your Google account:

From there, you’ll be taken to an account setup screen.
For your account name, you can use your name or your company name. You can track multiple websites on the same account, which makes things easier if you own a number of different websites:

Then, you’ll fill out the details for your new property, which is the website you would like to track. Enter your website’s name, URL, industry, and time zone and click “Get Tracking ID.”
After you accept the terms and conditions, you’ll be taken to a screen where you’ll see your tracking ID, a string of numbers beginning with the letters “UA.” Hold onto this ID as you continue to follow the steps below to set up Google Analytics in WordPress.
2. Install the Google Analytics by MonsterInsights plugin
Now that you have your tracking ID, you’ll need to install a plugin that will automatically add the tracking code to your site for you. We recommend the plugin Google Analytics by MonsterInsights because it is the most popular and most actively maintained plugin of this type, plus it makes it very easy to set up Google Analytics in WordPress:

To add it to your site, search for it by name under Plugins / Add New. When you find the right plugin, click the “Install Now” button.
WordPress will go through the process of installing the plugin. When it’s done, click “Activate Plugin” to turn it on.
3. Configure the plugin
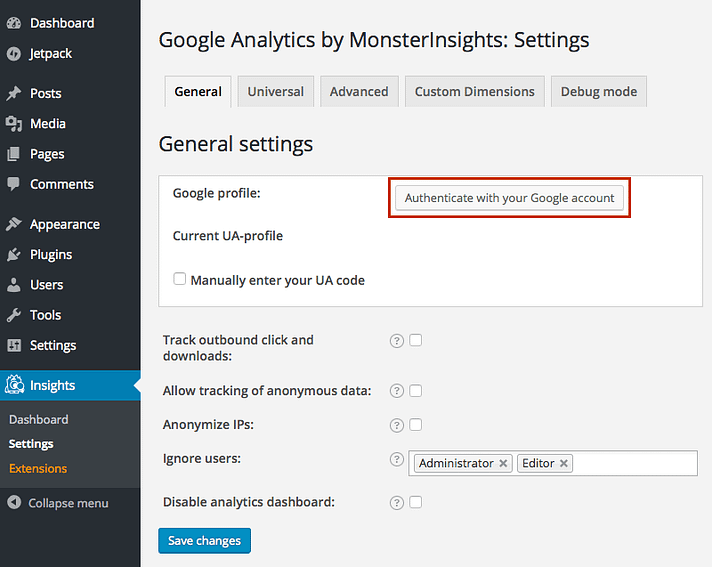
Now that you’ve installed and activated the Google Analytics plugin, you need to configure it so that it will communicate with your Google Analytics account. You can do this by clicking its “Settings” link on the Plugins page, or you can go through the left-hand menu bar and navigate to Insights / Settings:

From the main page of the plugin settings, click the button that says “Authenticate with your Google account”:
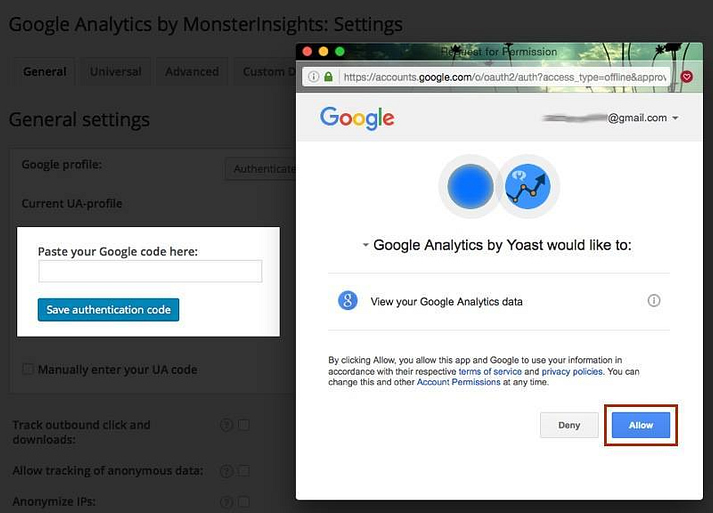
This will display a pop up window asking for permission to connect to your Google account. Click “Allow”:
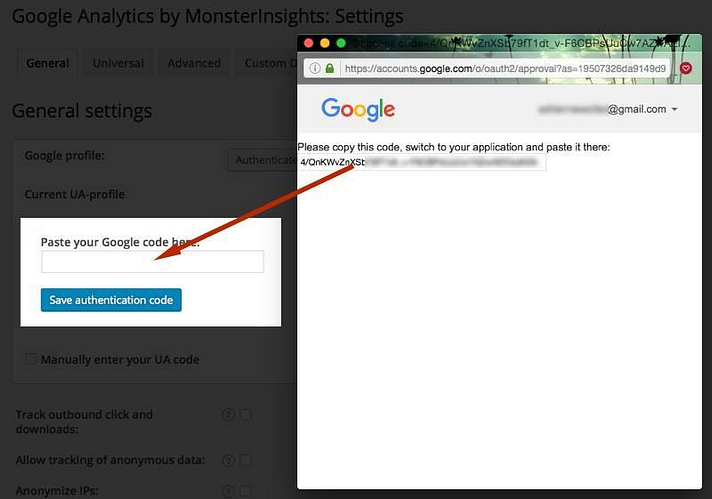
On the next screen, you will see a long string of random characters. Copy and paste this code into the highlighted box back in the WordPress tab. Click “Save authentication code”:
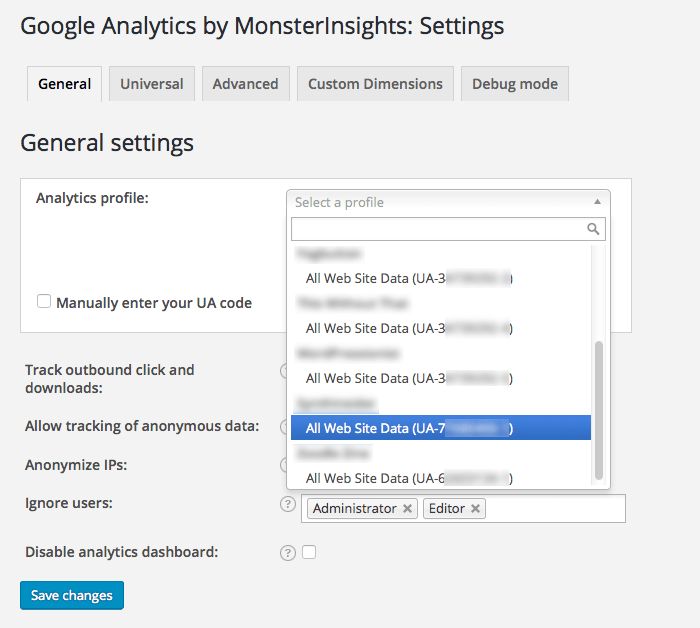
The settings screen will refresh to include a dropdown. In that dropdown, select the Google Analytics property that you just created. The tracking ID should match the UA code you created in step one. Click “Save changes”:
Congratulations, you’ve officially set up Google Analytics in WordPress! Now let’s test it to make sure it is working correctly.
4. Test Google Analytics
There are a number of ways to test that you have set up Google Analytics in WordPress properly, but by far the easiest way is to test it in Real-Time Analytics.
If you are still on the Admin screen in your Google Analytics, click “Reporting” at the top of the screen to go to the section of Google Analytics with tracking data. In the left side menu, click “Real-Time” to expand the submenu, then click “Overview.”
If you want to set up Google Analytics in WordPress for a brand new website, you most likely have 0 current visitors, which isn’t exactly helpful for trying to tell if your tracking code is working correctly.
By default, the Google Analytics by MonsterInsights plugin does not track visits from logged-in Administrators or Editors. This is a setting I recommend you leave as-is because tracking your own visits to your site can obscure the data you want. However, it also means that if you try to visit your own website in the same browser, your visits won’t be counted.
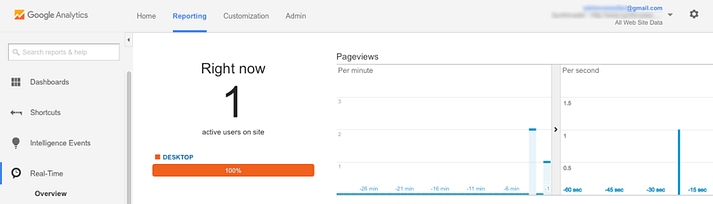
To get around this for testing purposes, open up your website in another browser, and click through a page or two to register your visit in Google Analytics. If everything is working as it should, immediately after doing this, Real-Time Analytics should show one visitor on your site. Like so:
If you still don’t see a visitor on your website, try opening your website in another browser or click the button in the plugin settings to “Re-authenticate with your Google account” to try again.
Final thoughts
That’s it – now that you’ve created a Google Analytics property for your website, installed and configured the plugin, and tested it, you can rest assured that you are capturing the data you need about your users and that you have successfully set up Google Analytics in WordPress.
Google Analytics is an invaluable tool for any blogger wishing to understand their audience and grow their traffic, so it is ideal if you get it up and running as soon as possible. In fact, it’s one of the very first things you should set up on a new blog.
There are a number of other popular Google Analytics plugins which all work similarly. Just make sure you don’t install more than one, or you could be tracking every visitor twice, artificially inflating your visitor numbers.